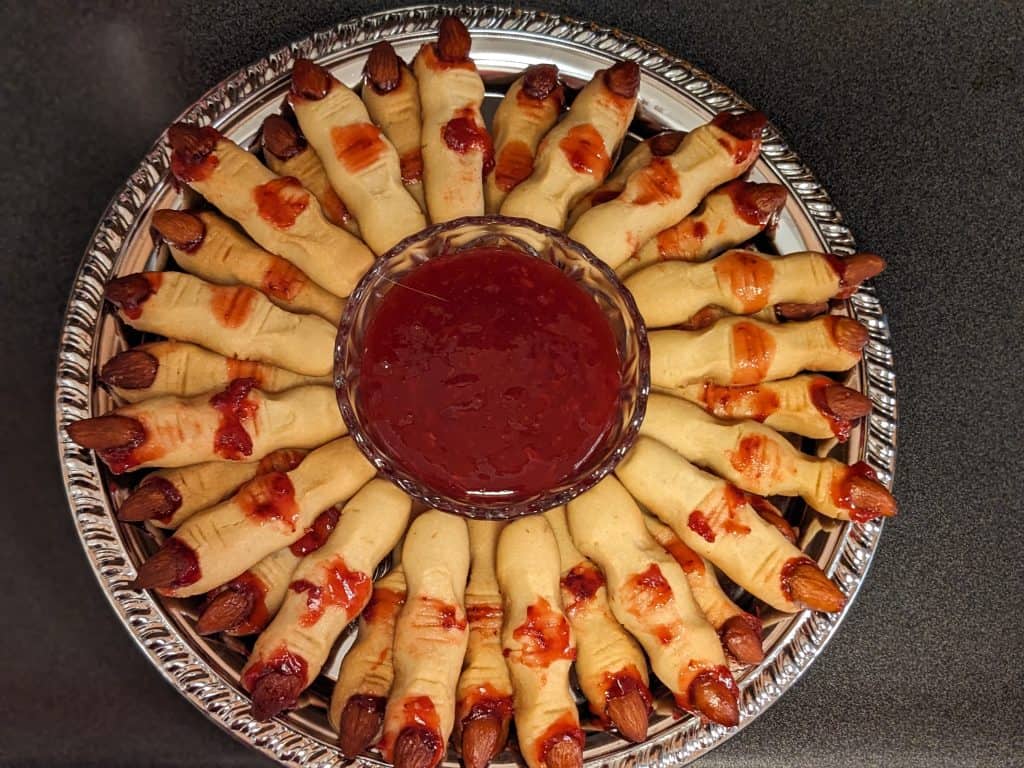
With Halloween just around the corner, are you looking for some delicious and spooky treats that also happen to be sugar free? These Sugar Free Witch Finger Cookies are the perfect addition to any Halloween themed dinner party, full-on party, or just a fun snack to enjoy while watching your favorite horror movie.
Challenge
One of the challenges of cooking for dietary restrictions is making what I’ll call “fun” foods or novelty foods. More specifically, I mean foods that are made to look like something else that is non-food related. My Keto Kitty Litter Cake is an example of one such dessert. Two times of the year that particularly jump out at me as lending themselves to these types of foods are April Fools’ Day and Halloween. You’ve likely seen examples of these foods strewn across the internet over the years. Meatloaf and mashed potato cupcakes for April Fools’ Day. Graveyard cakes, skeleton charcuterie boards, and brain-shaped jello molds for Halloween.
Where the issue comes in is that these types of foods often rely on non-keto or other dietary restriction-friendly ingredients to give them structure and decoration. That doesn’t mean we need to give up. Fortunately, I like figuring out these kinds of problems. (Which is why we’re all here. 🙂 ) I saw Witch Fingers popping up all over my Halloween food searches and decided they were my next hill to climb.
Solution
This recipe used these Keto Shortbread Cookies from All Day I Dream About Food as a base which I modified to suit my purposes. For the shaping and assembly instructions, I followed along with the pictures from Witch Finger Cookies by Texanerin Baking.
As noted, I enjoy figuring out these types of problems so you don’t have to.
Need some other dietary restriction variation? Let me know in the comments.
What You Need to Make Sugar Free Witch Finger Cookies
Equipment
- Paring Knife – For cutting the chilled butter and for cutting the knuckle marks into the “fingers.”
- Small Plate – For sticking the diced butter in the fridge while you work.
- Large Mixing Bowl
- Fine Mesh Sieve – For sifting the Almond Flour. You could try using a sifter, but I have not had good luck with that when working with almond flour. It’s denser than AP flour and tends to clump more on me.
- Measuring Cups
- Measuring Spoons
- Whisk
- Food Processor – If you don’t have a food processor, I would honestly suggest first using a fork or a pastry cutter if you have one to incorporate the chilled butter. Then switch to using your hands to bring the dough together.
- Rubber Scraper
- Small Microwave Safe Bowl – For microwaving the preserves. You’ll need them to be runny but sticky to apply the “blood” and then reattach the almond fingernails in the final assembly.
- Small Spoon – For stirring the melted preserves and applying them to the cookies.
- 2 Rimmed Baking Sheets
- 2 Silicone Baking Mats or Parchment Paper – I used silicone baking mats, but if you don’t have them, place sheets of parchment paper on your rimmed baking sheets.
Ingredients
- Unsalted Butter
- Almond Flour – As you may have seen in some of my other notes, I really do recommend sifting the almond flour for these cookies. You need as smooth of a texture as possible to help these cookies hold their shape. The xanthan gum is key, but having an even texture in the almond flour helps you with a more even distribution of the xanthan gum throughout the dough.
- Powdered Erythritol
- Xanthan Gum – Since we’re working with almond flour instead of regular all purpose flour or wheat flour, there’s no gluten to help everything stick together. The Xanthan Gum fills this void and that is why we’re using it in the quantity described below.
- Kosher Salt
- Vanilla Extract
- Whole Almonds – I used salted and roasted whole almonds. You can use blanched almonds if you prefer. It really depends on the color of “fingernails” that you want for the witch fingers.
- Sugar Free Strawberry Preserves – You can use another flavor of red jam / jelly / preserves if preferred. I am often challenged to find keto-friendly ones that don’t use any sucralose, so I make do with what I can find. I really like these Strawberry Rosé Preserves. However, they do use sucralose, so if that is an issue for you, pick a different keto-friendly option that’s red.
Getting Started with Making Sugar Free Witch Finger Cookies
Making the Dough
We’ll get started by dicing ¾ cup of Unsalted Butter. Then we’ll put it on a small plate or bowl and stick it back in the fridge to keep cold while you get the rest of the ingredients together.
Sift 4.5 cups of Almond Flour into a large mixing bowl. (Lori Side Note: I really do suggest sifting it. To make it easier and faster to sift, only try sifting about 1 cup at a time. If you dump the whole amount into the fine mesh sieve, it’s too heavy and becomes harder to sift.)
Add 1 ⅓ cup Powdered Erythritol, 2 teaspoons of Xanthan Gum, and 1 teaspoon Kosher Salt. Whisk to thoroughly combine the dry ingredients.
Dump all of the dry ingredients into the large bowl of the food processor and pulse a few times. Add 1 teaspoon of Vanilla Extract and about ¼ of the diced, chilled butter. Pulse a few times and scrape down the sides if necessary. Add another ¼ of the butter. Pulse a few more times and scrape down the sides again. Repeat this with the remaining 2 quarters of the butter.
The dough will have started to come together. Remove it from the food processor and place it back into the large mixing bowl. Use your hands to make sure it’s fully combined with no stray clumps of either dry ingredients or butter.
Shaping the Witch Finger Cookies
Lay out the silicone baking mats (or sheets of parchment paper) on your rimmed baking sheets. Then you’ll want to lay out one more sheet of parchment paper on the counter as your work surface. Go ahead and preheat the oven to 300°F now.
Roll the dough into small balls, about 1 ounce each or a 1.5 inch diameter. This should yield about 60 cookie balls (depending on how much of the dough you sample for taste testing purposes). If you’re like me, that consumes about 2 cookies. 🤷
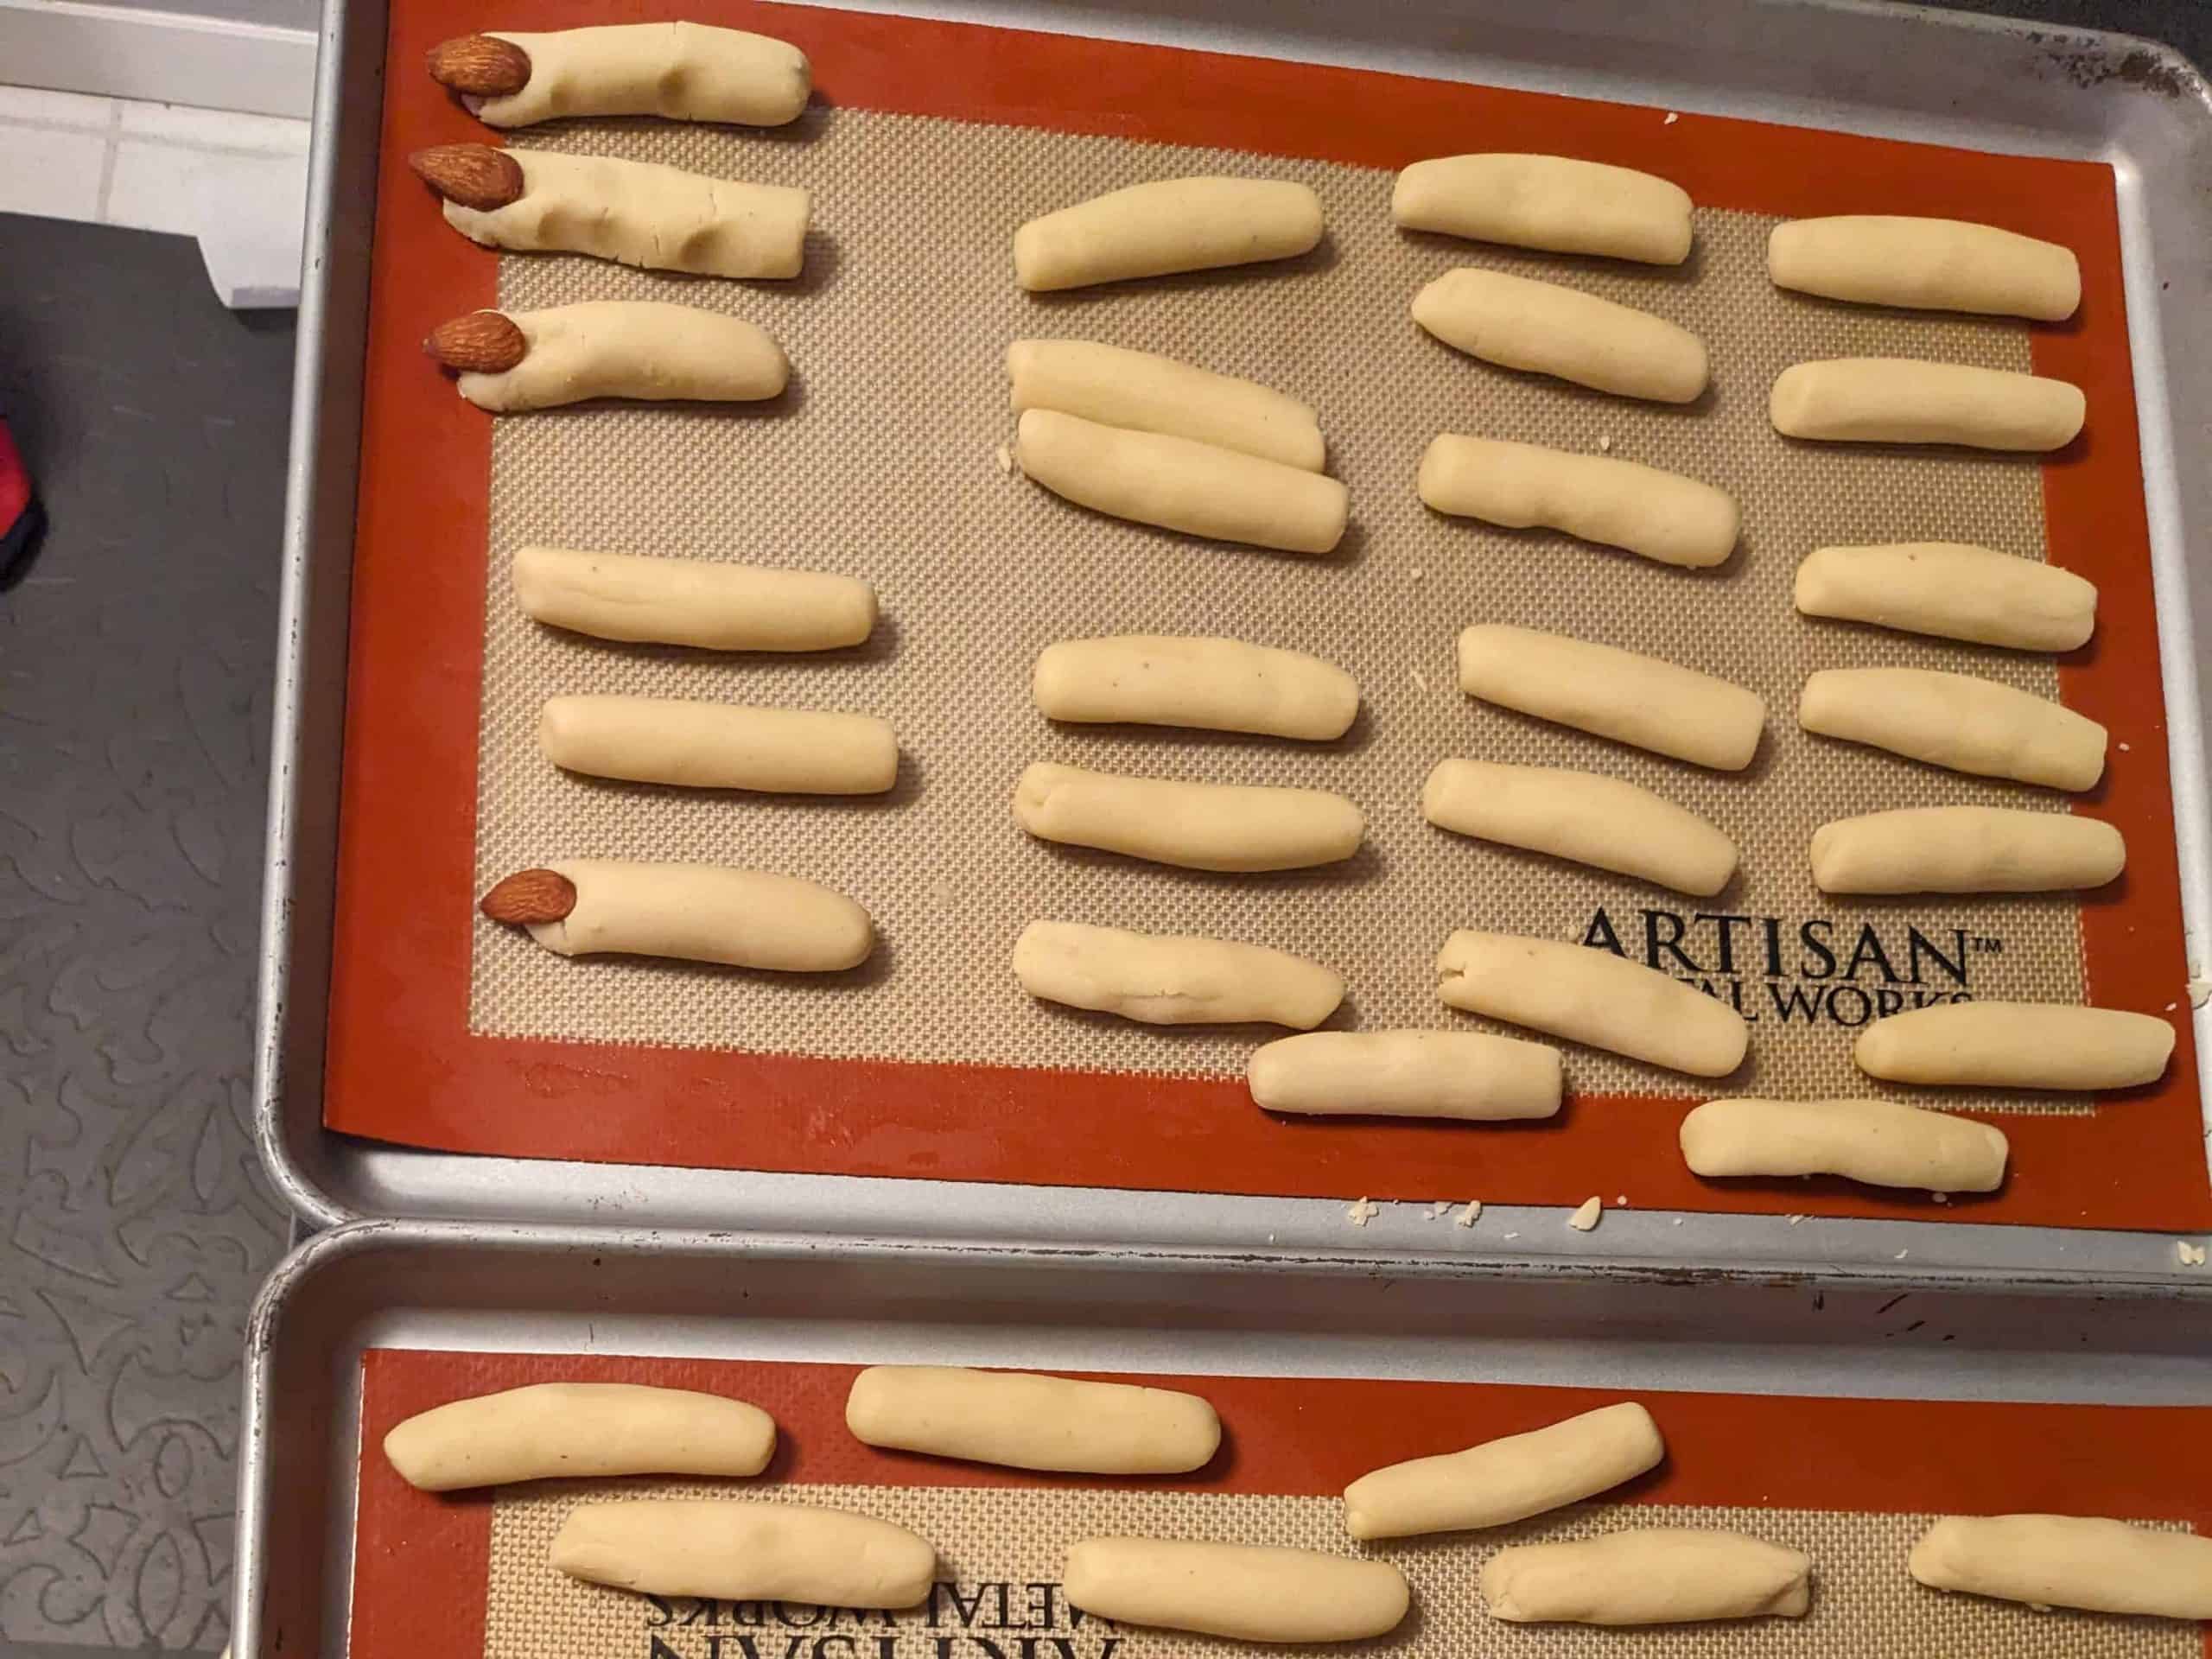
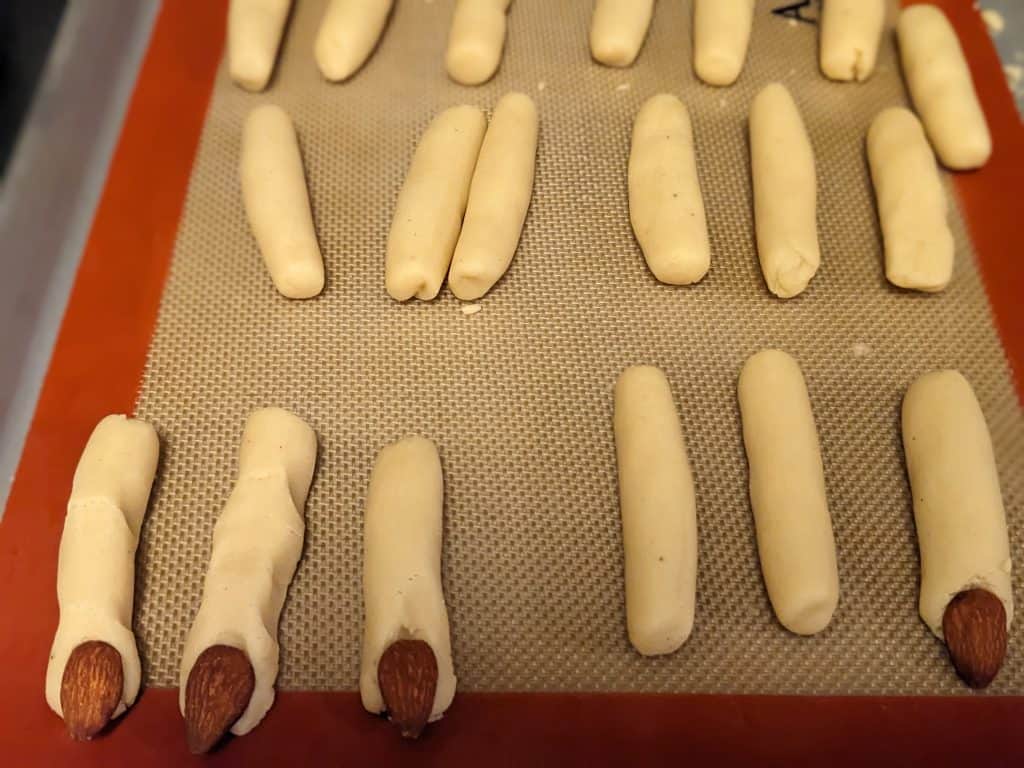
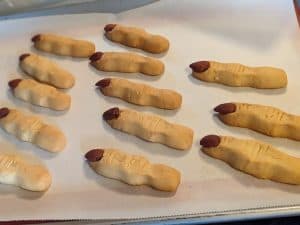
Take each cookie ball and, using the flat of your hand, roll it out into a cylinder about 3 inches long and about ⅝ to ¾ inch thick. Press an almond into one end of each cylinder like a fingernail and shape the dough around it like a finger joint. Then form a “knuckle” towards the center of each cylinder.
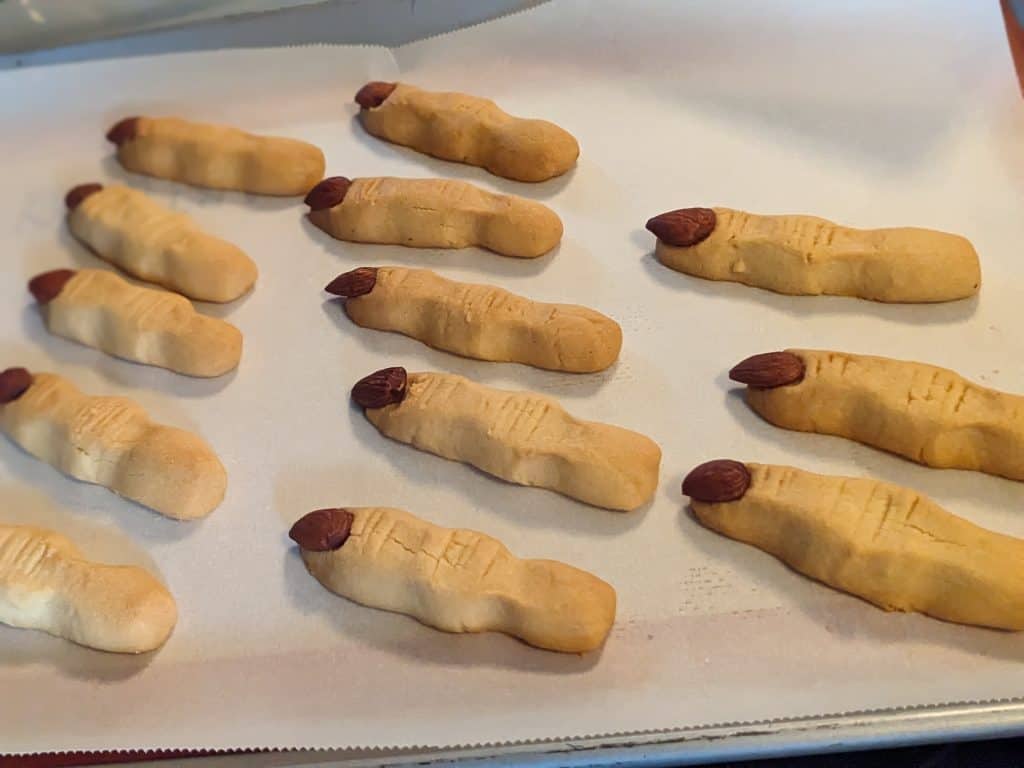
This is the end result you’re going for:
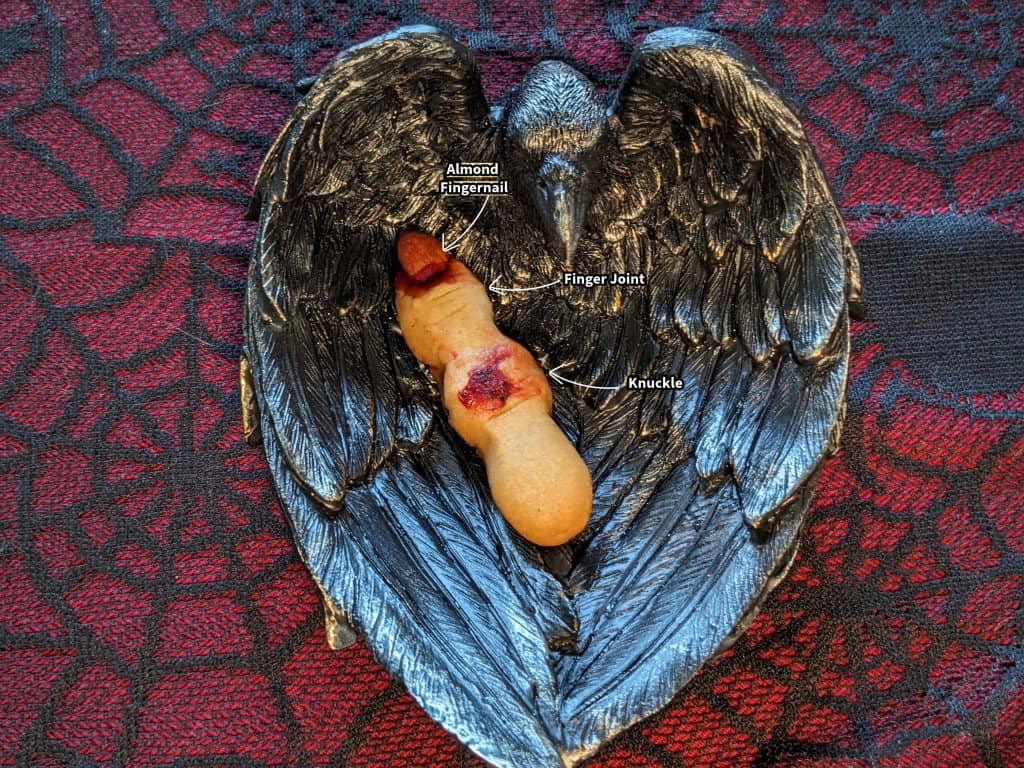
To make the creases for the knuckles and finger joints, use a sharp paring knife to make 3 – 4 (or so) shallow cuts across each. They’ll look more realistic if they aren’t precise, so don’t worry about evenness or consistency.
Baking the Cookies
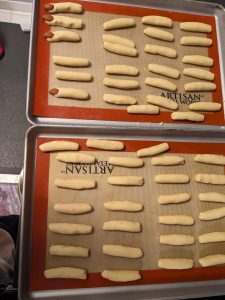
We’ll place the cookies on the rimmed baking sheets about an inch apart. They only spread a little bit, but you don’t want them close to touching. Bake them at 300°F for 25 to 30 minutes or until the bottoms are just turning golden. Check them at the 20 minute mark, as most ovens differ a bit, just to be on the safe side.
Turn off the oven and crack open the door of it. Let the cookies sit in the oven until they are firm to the touch. For me, this was about 20 minutes, but I checked them after 10 minutes and set alarms so I wouldn’t forget them. Then we’ll remove the cookies from the oven and allow them to cool completely on the baking sheet.
Final Assembly of the Keto Witch Finger Cookies
To assemble the Keto Witch Finger Cookies, you’ll want to get out a small bowl for heating the strawberry preserves and a small spoon. Stick about ½ cup of the Sugar Free Strawberry Preserves in the microwave for 30 seconds on high. Then you’ll want to give it a stir and continue microwaving it in 10 second increments until it’s a very soft gel.
You’re going to want to leave the cookies laid out on the sheet pans for this. If you can make room for a whole rimmed baking sheet in your fridge that would be great. If not, try to make room for a couple of smaller containers.
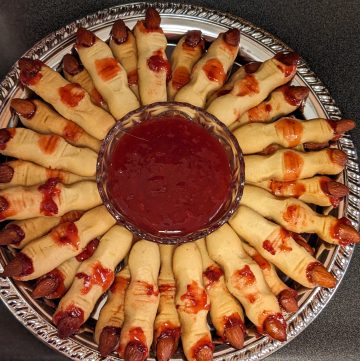
To make the bloody nails, you need to gently pry up the almond fingernails. Then you’ll use the spoon to add a dab of strawberry preserves to the “nail bed” before pressing the almond nail back in place. The gelled preserves will well up like blood around a fingernail. (Gross, I know, but that is the point. 🙂)
As the final touch, you’ll want to smear a dab of preserves across the knuckles. This doesn’t need to be neat and will look more realistic if it isn’t, so you can happily check any perfectionist tendencies at the door.

Serving and Storage
I like to stick the whole tray of them in the fridge for about 30 minutes to hurry up the setting of the preserves. If I’m making them in advance and need to store them in an airtight container, this makes it easier to stack the cookies on sheets of waxed paper without the preserves sticking to everything.

Plate them with an additional little bowl of heated preserves for dipping and you’re good to go.
Related Recipes
Are you wondering what else to serve with your Keto Witch Finger Cookies? You might want to try:
- Eyeball Hors d’Oeuvres (a.k.a. Prosciutto and Mozzarella Nests)
- Bloody Coffin Brie (a.k.a. Melty Chili Garlic Brie)
- Stuffed Pepper Jack-O-Lanterns
- Keto Black Bat Crackers with Blood Moon Soup (a.k.a. Roasted Tomato Poblano Soup)
Looking for a full menu? Take a look at my Casual Halloween Dinner Party.
Sugar Free Witch Finger Cookies
Ingredients
- ¾ cup Unsalted Butter Chilled and diced
- 4.5 cups Almond Flour sifted
- 1 ⅓ cup Powdered Erythritol
- 2 teaspoons Xanthan Gum
- 1 teaspoon Kosher Salt
- 1 teaspoon Vanilla Extract
- 60 Whole Almonds About 1 cup. I used salted and roasted whole almonds. You can use blanched almonds if you prefer.
- ½ cup Sugar Free Strawberry Preserves can use another flavor of red jam / jelly / preserves if preferred
Instructions
- Dice ¾ cup Unsalted Butter into small pieces and then stick it back in the fridge until you’re ready for it.¾ cup Unsalted Butter
- Sift 4.5 cups Almond Flour into a large mixing bowl. Add 1 ⅓ cup Powdered Erythritol, 2 teaspoons Xanthan Gum, and 1 teaspoon Kosher Salt. Whisk to thoroughly combine the dry ingredients.4.5 cups Almond Flour, 1 ⅓ cup Powdered Erythritol, 2 teaspoons Xanthan Gum, 1 teaspoon Kosher Salt
- Dump all of the dry ingredients into the large bowl of the food processor and pulse a few times. Add 1 teaspoon Vanilla Extract and about ¼ of the diced, chilled butter. Pulse a few times and scrape down the sides if necessary. Add another ¼ of the butter. Pulse a few more times and scrape down the sides again. Repeat this with the remaining 2 quarters of the butter.1 teaspoon Vanilla Extract
- Once the dough has started to come together, remove it from the food processor and place it back into the large mixing bowl. Use your hands to make sure it’s fully combined with no stray clumps of either dry ingredients or butter.
- Lay out silicone baking mats (or sheets of parchment paper) on 2 rimmed baking sheets. Then lay out one more sheet of parchment paper on the counter as your work surface.
- Preheat the oven to 300°F now.
- Roll the dough into small balls, about 1 ounce each or a 1.5 inch diameter. About 60 cookie balls.
- Using the flat of your hand, roll each cookie ball out into a cylinder about 3 inches long and about ⅝ to ¾ inch thick. If it starts to break apart, re-roll it into a ball and try again.
- Press an almond (1 of the 60 Whole Almonds) into one end of each cylinder like a fingernail and shape the dough around it like a finger joint. Then form a “knuckle” towards the center of each cylinder.60 Whole Almonds
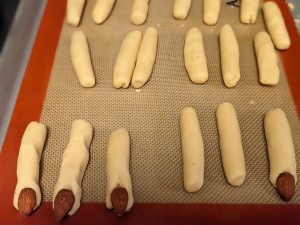
- To make the creases for the knuckles and finger joints, use a sharp paring knife to make 3 – 4 (or so) shallow cuts across each. No need to be precise.
- Place the cookies on the rimmed baking sheets about an inch apart.
- Bake them at 300°F for 25 to 30 minutes or until the bottoms are just turning golden. Check them at the 20 minute mark, as most ovens differ a bit, just to be on the safe side.
- Turn off the oven and crack open the door of it. Let the cookies sit in the oven until they are firm to the touch. (About 20 minutes, but check them after 10 minutes.) Remove the cookies from the oven and allow them to cool completely on the baking sheet.
- To assemble the Keto Witch Finger Cookies, heat about ½ cup Sugar Free Strawberry Preserves in a small bowl in the microwave for 30 seconds on high. Stir and continue microwaving it in 10 second increments until it’s a very soft gel. Leave the cookies laid out on the sheet pans for assembly.½ cup Sugar Free Strawberry Preserves
- To make the bloody nails, gently pry up the almond fingernails. Use a small spoon to add a dab of strawberry preserves to the “nail bed” before pressing the almond nail back in place. The gelled preserves will well up like blood around a fingernail.

- Smear a dab of preserves across the knuckles. (Doesn’t need to be neat and will look more realistic if it isn’t.)
- Plate the cookies with an additional little bowl of heated preserves for dipping. If making in advance, allow the preserves to set before stacking them on waxed paper sheets in an airtight container.

Equipment
- Paring Knife For cutting the chilled butter and for cutting the knuckle marks into the “fingers.”
- Small Plate For sticking the diced butter in the fridge while you work.
- Large Mixing Bowl
- Fine Mesh Strainer or Sieve For sifting the Almond Flour.
- Measuring Cups
- Measuring Spoons
- Whisk
- Food Processor
- Small Microwave Safe Bowl For microwaving the preserves.
Notes
https://alldayidreamaboutfood.com/keto-shortbread-cookies/


Leave a Reply